Dee’s Carbonara


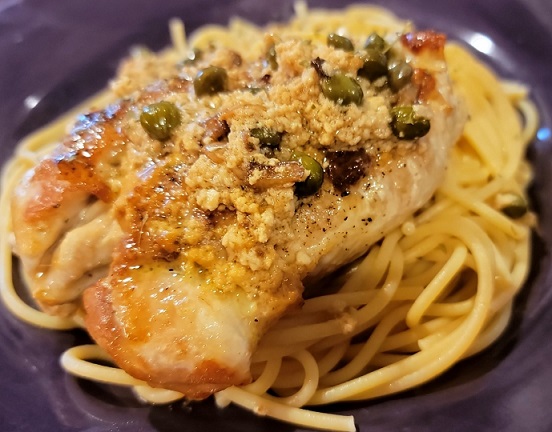
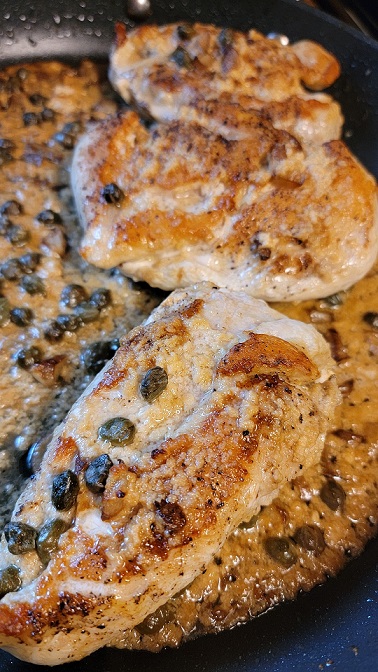
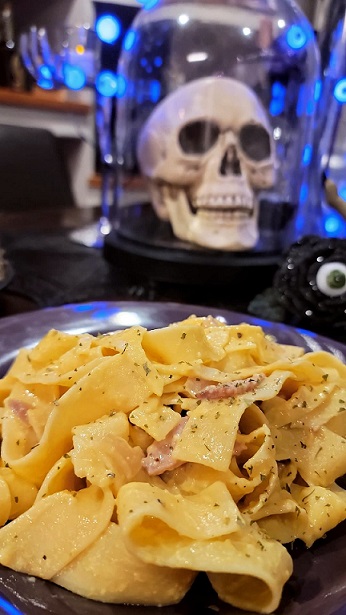
Okay, so this is one of my absolute favorite comfort foods. I would always order this out at restaurants and am glad that I can now make it at home since it is much simpler than I envisioned! It takes just a few ingredients to make, and the result is this creamy, delicious pasta that the whole family will love. Some might prefer to add cream to their carbonara; however, this recipe requires none. The most challenging part of this recipe is probably making the creamy sauce, but don’t worry, I’ll walk you through the technique!

Carbonara Ingredients

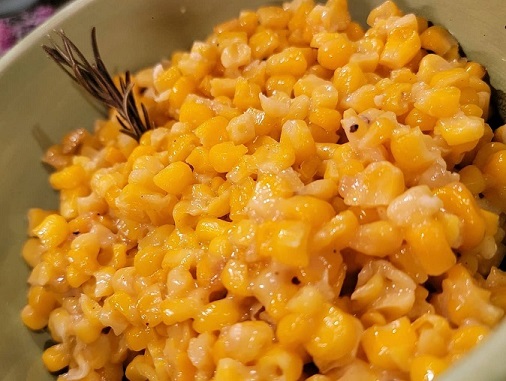
  • spaghetti of choice, sometimes I use egg noodles (pictured above, and it’s just as good!)
  • 2 whole eggs (room temperature)
  • 3 additional egg yolks (room temperature)
  • 6 tbsp Pecorino Romano
  • 1/2 lb Guanciale (Italian cured meat), if you cannot find any, use thick-cut pork bacon or pancetta.
  • 1/2 reserved pasta water
  • salt and pepper, to taste (you may want to omit the salt since the guanciale is salty, your choice)
  • parsley, to top (optional)
  • extra cheese, to top (optional)

Cooking Instructions

  1. Grab a large pot, add water & salt and bring to a boil.
  2. While that takes time to boil, use a small bowl, beat eggs, and mix with pecorino romano.
  3. Slice your guanciale into cube-sized pieces.
  4. Heat a non-stick pan on medium heat and add the guanciale. Cook until it looks crispy, roughly 5-8 minutes.
  5. Once cooked, turn off the heat and set aside (turning off the heat is essential). Make sure not to drain the fat from the pan.
  6. Add your spaghetti and make sure to cook al dente (usually written in the box).
  7. Once cooked, reserve 1/2 pasta water; you will need this for the sauce.
  8. Remove pasta from water using tongs and place in the non-stick pan where the guanciale is and toss. Do not worry about draining the pasta; this will help with making the sauce.
  9. Quickly, and I mean QUICKLY, pour in the cheese & egg mixture and toss until thickened.
  10. Add some of the pasta water you reserved in increments until the sauce is as creamy as you’d like.
  11. Season with salt & pepper.
  12. Top with parsley and some extra pecorino romano (optional).
  13. Enjoy!

Note: This should be eaten as quickly as possible for the best flavor. Remember, if you cannot find guanciale, use thick-cut bacon or pancetta. Also, I’ve made this with turkey bacon for a “healthier” version, and it tastes just as good! Make sure that the heat is off before placing the pasta in the non-stick pan. If it’s too hot, the egg mixture will cook, and you will have a scrammbled egg mixture (no bueno).

First time I made carbonara. I tend to use different noodles for some variety.

Did you try this recipe? Rate it below and leave a comment. I’d love to hear your feedback.

View Posts

Go back

Your message has been sent

Rating

Warning

Burrata Arugula Salad

Burrata is an Italian cheese that has a soft outer layer. It consists of a creamy center that oozes yumminess, so you’re definitely in for a treat. When you dig in, I am sure you will be delighted with EVERY bite. This is a dish I like to make when I want something refreshing. Although it may look as if it may take quite some time to make, this salad could not be more straightforward since it requires NO cooking. Most of the work is just some prepping of the tomato and onion, and that is it!

Salad Ingredients

  • 1 ball of burrata cheese, here is the link of the one we usually buy.
  • arugula (the amount all depends on how big you want your salad to be).
  • 1 tomato, diced, you can also use a handful of cherry tomatoes just slice them in half.
  • 1/2 red onion, sliced
  • 2 tbsp extra virgin olive oil
  • 2 tbsp balsamic vinegar or glaze of choice
  • 2 tbsp parmesan cheese, shaved. This is our favorite.
  • Basil, chopped
  • salt and pepper, to taste

Instructions

  1. Rinse your arugula and lay it out on a platter or bowl (whichever you prefer), leaving some space in the middle to place the burrata.
  2. Drain the burrata and place in the middle of a platter or bowl.
  3. Add the tomato and onion.
  4. Top with shaved cheese.
  5. Add basil.
  6. Drizzle with olive oil and vinegar.
  7. Sprinkle with salt and pepper to taste.
  8. Enjoy!

Note: You can also add other ingredients you might want in your salad, such as dried cranberries, crushed pistachios, or slivered almonds! I would suggest eating this right away to avoid soggy salad. I’ve also served this with fresh toasted bread, and it was a hit!

Did you try this recipe? Rate it below and leave a comment. I’d love to hear your feedback.

View Posts

Go back

Your message has been sent

Rating

Warning

Spudtacular Potatoes w/ Garlic Aioli

Deliciously crispy & packed with flavor!


I’ve never been a huge fan of potatoes; however, after trying these out in the air fryer, I cannot get enough of them! The best part about this recipe is how easy it is to throw together, and all the ingredients are probably already in your pantry. All you basically do is toss these in a bowl with some spices and let your air fryer or oven do the work. Also, if you have not bought yourself an air fryer, what are you waiting for?! Shout out to my brother who bought us ours, and it is now the most used gadget in our home (LOVE you, Dan).

Potato Ingredients

  • 1 bag of fingerling potatoes, sliced in half lengthwise, we use these
  • 1 tbsp olive oil
  • 1 tbsp minced garlic- if you don’t have minced, you can use garlic powder
  • 1 tbsp parmesan cheese, grated
  • 1 tbsp thyme
  • salt and pepper, to taste

Cooking Instructions

  1. Rinse your potatoes and slice them in half lengthwise.
  2. Use a bowl to toss your potatoes with olive oil.
  3. Add the rest of the spices and mix until well combined and evenly coated.
  4. Grab your air fryer and insert your potatoes in the basket.
  5. Fry at 400 degrees for 28-30 minutes, stopping, shaking, and tossing the basket every 8-10 minutes.
  6. While the potatoes are cooking, make your aioli.
  7. Place them on a plate and top with additional parmesan if you wish, and some parsley.
  8. Enjoy!

Aioli Ingredients

  • 1/4 cup of mayo
  • 1 tbsp Dijon mustard
  • 1 tsp minced garlic (we enjoy having the chunks of minced garlic, but feel free to use garlic powder if you prefer)
  • 1 tbsp olive oil
  • 1 tsp parsley
  • salt and pepper, to taste
    • Mix all ingredients in a bowl.

Note: You can also put these potatoes in the oven face down and bake at 400 degrees for 15 minutes, then take them out, flip them and cook for an additional 10 minutes until you are able to pierce them with a fork easily.

Did you try this recipe? Rate it below and leave a comment. I’d love to hear your feedback.

View Posts

Go back

Your message has been sent

Rating

Warning

Dee’s Garlic Explosion Burgers

If there is one thing we enjoy in this house, it’s burgers (family and friends will vouch for this). Anyway, I wanted to find a way to elevate our homemade burgers, and this is how this recipe came about. I love the taste of garlic (this is an understatement), so I planned to find a way to stuff burgers with a punch of garlic where every single bite will deliver an explosion of flavor. Although this recipe is a bit tedious, I promise the end result will be so worth it. These are requested quite frequently at our BBQs, and I am sure after trying this recipe, you’ll see why!

These burgers are so good; they’re scary.

Garlic Filling & Sauce

Ingredients & Instructions

Garlic Filling

  • 2 tbsp minced garlic
  • 3 oz cream cheese, room temperature
  • 1 tsp oregano
  • 1 tsp paprika
  • 1 tsp thyme
  • 1 tsp basil
    • Mix all ingredients in a bowl.

Garlic Sauce

  • 2 tbsp minced garlic
  • 2 tsp garlic powder
  • 1/2 cup water, divided
  • 2 tbsp cornstarch
  • 16 oz heavy cream
  • salt and pepper to taste
    • Cooking Instructions:
      • In a small saucepot, boil 1/4 cup of the water and garlic for roughly 5 minutes on medium-high heat.
      • Once the water is nearly evaporated, stir in the heavy cream, garlic powder, salt, and pepper.
      • Once that is mixed, grab a small bowl and mix the remaining 1/4 cup of water and 2 tbsp cornstarch.
      • Add to mixture in the pot and let boil for 4 minutes.
      • Turn off the heat and continue whisking for 3 minutes until sauce is thick.

Onion Topping Ingredients & Instructions

  • 1 large red onion, sliced
  • 2 tbsp butter
  • 2 tbsp red wine vinegar
  • half lemon, squeezed
  • 1 tbsp honey
  • 2 tbsp breadcrumbs, we use these
    • Cooking Instructions:
      • In a medium sauce pot on medium high-heat, place the butter.
      • Once melted, add your onion
      • Allow to wilt for about 7 minutes
      • Once wilted, add the lemon, honey, and red wine vinegar and stir until well incorporated
      • Add the breadcrumbs and mix well
      • Turn off heat
      • The onions will begin to clump together and form a thick crumble

Burger Ingredients

  • cheese slices of choice
  • 1 lb of ground meat, we usually grab the package with 10% fat
  • 1 lbs ground pork
  • 1 tbsp Worcestershire sauce
  • 1 tbsp paprika
  • 1 tbsp minced garlic
  • burger buns of your choice, we usually do brioche or onion rolls

Burger Cooking Instructions

  • Preheat your grill to 500 degrees
  • Mix the ground meats along with spices, sauce, and garlic.
  • Divide burgers into 8 portions.
  • Now shape the meat into patties and place a scoop of the garlic filling on top.
  • Place another patty on top of the above formed one gently press together with your hands to form a burger.
  • Place burger on the grill and cook for 4-5 minutes on each side.
  • Cook until the burgers reach an internal temperature of 150 degrees more or less, depending on your liking.
  • Top with cheese slice of choice just so that the cheese melts, approximately one additional minute (do not close grill during this process)
  • Place on a bun.
  • Top with onions and garlic sauce
  • Enjoy!

Note: Once you turn off the heat for the sauce, it’ll continue thickening, so do not worry. If you have any garlic sauce leftover, you can store it in the fridge for about two days. Our family sometimes uses the sauce for grilled sandwiches the next day. Also, the onion crumble can be incorporated into other dishes so if you have any leftover, make sure to refrigerate them. If you are feeling adventurous, add a fried green tomato like I did in the first picture!

What dreams are made of. (at least mine lol)

Did you try this recipe? Rate it below and leave a comment. I’d love to hear your feedback.

View Posts

Go back

Your message has been sent

Rating

Warning

Gooey Almond Cookies

If I am honest, I never considered myself much of a baker (still don’t) BUT, I’ve recently started experimenting with flavors I’ve liked, and I can’t say I’m disappointed. Anyway, for this recipe, I originally wanted to make it with lemon exact; however, once I got to my pantry, I realized I was out and had to improvise. My absolute favorite part about these cookies is how soft and creamy they stay. Sometimes it’s even hard for us to wait for them to cool down entirely (GUILTY!). Needless to say, these cookies are a hit. My friends and family rave over them! Also, don’t mind the Christmas picture, it’s my favorite one from when I made these cookies in December of 2020.

Ingredients

  • 1/2 cup of butter (1 stick)
  • 1 tbsp baking powder
  • 2 1/4 cups flour
  • 8 oz cream cheese
  • 1 1/4 cup of granulated sugar
  • 1 tsp almond extract
  • 1 egg
  • 1/4 cup powdered sugar

Cooking Instructions

  1. Preheat your oven to 350 degrees.
  2. In one bowl, mix flour, baking powder, and 1/4 powdered sugar. Mix lightly and set aside.
  3. Use your mixer (stand or hand) in a separate bowl to mix cream cheese, butter, and granulated sugar.
  4. Now add the almond extract and the egg. Stir until well combined.
  5. Begin adding the dry ingredients (flour, baking soda, and powdered sugar). Make sure your mixer is on low and make sure not overmix the dough.
  6. Once well mixed, cover with cling wrap and place in the refrigerator for 30 minutes.
  7. Grab your cookie sheet, or if you don’t have one use a sheet pan with parchment paper.
  8. Use a small bowl and add some powdered sugar to it (to roll your cookies in).
  9. Once the batter has chilled for 30 minutes, use an ice cream scooper to make roughly 2 tbsp cookie balls.
  10. Roll the cookie in the bowl with the powdered sugar until the cookie has powdered sugar all over.
  11. Place on cookie sheet (not too close to one another) and bake for 15 minutes.
  12. Allow cookies to cool.
  13. Enjoy!
Here is a quick video of the process!

Note: Try not over mix the batter and use your mixer at a low speed.

Did you try this recipe? Rate it below and leave a comment. I’d love to hear your feedback.

View Posts

Go back

Your message has been sent

Rating

Warning

Lemon Caper Chicken

This is another one of my favorite chicken recipes because it is bursting with flavor, and the sauce is perfect over most grains/carbs. The acidity of the capers and the lemon is just divine! You can whip it up in about 15 minutes and then finish it up in the oven. This reminds me a bit of chicken piccata minus the breading of the chicken.

Right out of the oven.

Ingredients

  • 3 chicken breast
  • 2 tbsp olive oil
  • 2 tbsp minced garlic
  • 1 tbsp of butter
  • 2 tbsp capers
  • juice of 1 lemon
  • zest of 1 lemon
  • 1/2 cup of heavy whipping cream
  • 1 cup of chicken broth (I use unsalted)
  • Salt
  • Pepper

Cooking Instructions

  1. Preheat your oven to 375 degrees.
  2. Grab a medium sized pan, add the olive oil and set to medium-high heat.
  3. Season both sides of your chicken breast with salt and pepper.
  4. Once pan is hot, place your chicken breast in the pan and cook for 5 minutes on each side.
  5. While chicken is cooking, mince your garlic.
  6. Once chicken is cooked on both sides, remove from pan and place on a plate.
  7. Using the same pan, set to medium heat and add your butter.
  8. Once butter has melted, add your garlic and cook for a minute until fragrant.
  9. Now set your heat to medium low and add the chicken broth to deglaze the pan.
  10. Once deglazed, stir in the heavy cream and let cook for 3 minutes.
  11. Add chicken back to the pan and coat with sauce.
  12. Place in the oven for 18-20 minutes.
  13. Remove from oven and place over cooked spaghetti.
  14. Enjoy!

Note: You can serve this over pasta as I have done in these pictures, but feel free to substitute for rice of your choice. It works and taste just as great!

Did you try this recipe? Rate it below and leave a comment. I’d love to hear your feedback.

Remember to tag me on IG so that I can feature you on my page!

View Posts

Go back

Your message has been sent

Rating

Warning

Cuban Style Picadillo


Cuban-style picadillo is a dish I am very familiar with, but to be honest, it’s hard to find a good picadillo. Nothing compares to homemade. My all-time favorite is the one my Mima makes me with olives and raisins YUM-sorry mom lol. I have always been afraid to make it thinking it would not come close to my abuelas; however, she and my mom recently approved, so I decided to share! This recipe goes so well over rice, pasta, and you can even use the filling to stuff your homemade empanadas (will post our family empanada recipe soon). This recipe offers a slight tang from the tomatoes and olives, yet a hint of sweetness when you bite into the raisins.

Ingredients

  • 2 lbs ground meat, we use 90% lean
  • 2 tbsp olive oil
  • 1 medium sized yellow onion, diced
  • 1 red pepper, diced
  • 3 tbsp garlic, minced
  • 1/2 cup tomato sauce of your choice
  • 1 14.5 oz can of diced fire roasted tomatoes, we use this one
  • 4 tbsp Spanish manzanilla olives, sliced
  • 2 tbsp raisins
  • 2 tbsp paprika
  • 2 tbsp oregano
  • 2 tbsp basil
  • 1 tbsp thyme
  • 1 tbsp cumin
  • Salt and pepper, to taste

Cooking Instructions

  1. Grab a skillet, add olive oil, and set it to medium high heat.
  2. Place you onions and pepper in the skillet and cook for about 5-7 minutes until tender.
  3. Add the garlic and cook for an additional minute.
  4. Add the ground meat and begin breaking it apart.
  5. Now add all the spices and toss to make sure they are well incorporated.
  6. Cook for about 7-10 minutes.
  7. Once the meat is browned and almost done, add the fire roasted tomatoes and tomato sauce.
  8. Mix well.
  9. Add the olives and the raisins.
  10. Set the heat to low and let simmer for an additional 5 minutes.
  11. Pour over rice or pasta and enjoy!

Note: If I am able to find cubanelle peppers, I use two of these instead of the red peppers. I know cubanelles aren’t commonly seen in all grocery stores, so just in case you come across them, try them out in this recipe. Also, instead of olives, sometimes I use this olive salad… OMG must try.

Did you try this recipe? Rate it below and leave a comment. I’d love to hear your feedback.

View Posts

Go back

Your message has been sent

Rating

Warning

Braised Short Ribs w/ Parmesan Polenta

I have always been a huge fan of short-ribs, so it was only fair to try making my own at home. This recipe does take quite a bit of prepping and cooking time, but I promise you the end result is so worth it-OFF THE BONE WORTH IT! I decided to pair this with a creamy, cheesy polenta which compliments the short-ribs so well. I hope you enjoy this recipe as much as we do!

I buy my short ribs from my local Publix since the butcher there is AMAZING. Also, shout out to my besties (Fayne & Gio) for this custom cutting board!
Right before putting the lid and placing in the oven.
This is what they will look like once you remove the short ribs from the oven. I like to place the lid back on and leave them in the oven for another 30 minutes with the oven off so that the sauce becomes a bit thicker.

Short Ribs Ingredients

  • 9 bone-in short ribs
  • 2 tbsp olive oil
  • 5 stalks of celery
  • 1 shallot, diced
  • 2 tbsp butter
  • handful of baby carrots
  • 1 tbsp tomato paste
  • 1 tbsp dijon mustard
  • 5 cloves of garlic, minced
  • 2 tbsp flour
  • 1 bay leaf
  • 1 cup chicken stock
  • 1 cup of red wine (we used cabernet sauvignon)
  • 3 sprigs of rosemary
  • 2 sprigs of sage
    • I make a sauce to incorporate before placing the short ribs the oven (this is completely optional since I have made it both ways, and it still tastes amazing. This adds a bit of a tang).
      • 1/4 cup coconut aminos
      • 1 tsp rice vinegar
      • 1 tbsp honey
      • 1 tsp red pepper flakes or sriracha

Short Rib Cooking Instructions

  • Preheat oven at 350 degrees.
  • Sprinkle salt and pepper all over your short-ribs, making sure to get all sides.
  • Heat olive oil in your dutch oven over medium-high heat. I use a 6qt dutch oven.
  • Once heated, place your short-ribs inside the dutch oven and brown on each side. I did 4 at a time since that was all that fit.
  • Once browned, remove the ribs from the dutch oven and place them in a separate plate.
  • Add the butter and shallot. Cook until translucent, roughly 5-6 minutes.
  • Now add the carrots and celery and cook for an additional 5 minutes.
  • After 5 minutes, add the minced garlic and cook for an additional minute.
  • Add the flour, tomato paste, and dijon mustard. Stir to make sure all ingredients in the pot are coated.
  • Pour in the wine and raise the temperature to high until it begins to simmer. Make sure to deglaze the dutch oven by scraping the bottom. Once deglazed, bring the heat down to medium.
  • Add the chicken stock.
  • Now add the short-ribs back into the dutch oven.
  • Stir in the additional sauce mentioned above if using it.
  • Add the rosemary, sage, and bay leaf.
  • Cover and place in the oven for 2 hours and 45 minutes.
  • Enjoy!

Polenta Ingredients

  • 3 tbsp butter, unsalted
  • 1 1/2 cups whole milk
  • 2 cups of half and half
  • 1 cup yellow cornmeal (I buy coarse ground, meaning it will produce a creamy polenta with some texture)
    • You may choose to use stone ground if you’d like, and this type of cornmeal has a lot of texture and a rich corn flavor
  • 1/2 cup parmesan cheese
  • 1/4 cup mascarpone cheese
  • Salt & pepper, to taste

Polenta Cooking Instructions

  • Grab a pot and set to medium heat.
  • Place the butter in the pot and allow it to melt.
  • Once the butter is melted, add the milk, half & half, cornmeal, salt & pepper to the pot.
  • Stir frequently for roughly 10-12 minutes.
  • You will know your polenta is done once it becomes thicker and creamy.
  • Once it has thickened, add the cheeses and stir for about 2-3 minutes.
  • Remove from stove and enjoy!

Note: If you do not want to use alcohol for your recipe, feel free to use beef/chicken broth as a substitute. If you do not use wine, skip the deglazing step. I have also opted out of using the half and half in the polenta in the past and just replaced it with chicken stock, and it is delicious as well.

Did you try this recipe? Rate it below and leave a comment. I’d love to hear your feedback.

View Posts

Go back

Your message has been sent

Rating

Warning

Honey Butter Corn

Corn is such a simple ingredient to transform and this is exactly what I did for this recipe. I used frozen corn which beats removing the husk and shucking the corn yourself and added simple ingredients to the corn to make it rich, slightly sweet and creamy! The ingredients used are commonly in my pantry which was a plus! The total time for cooking is no more than roughly 15 minutes making it a quick and easy side dish to serve. Hope you enjoy this one as much as we did!

Ingredients

  • 16 oz bag of frozen sweet corn
  • 3 tbsp butter
  • 2 tbsp honey (we used this honey because it’s local and their honey is AMAIZEING lol)
  • 2 oz cream cheese
  • salt and pepper to taste

Cooking Instructions

  1. Grab a skillet and set to medium heat.
  2. Place the butter & honey in skillet and allow it to melt.
  3. Once the butter & honey are melted, add the corn and cook for 7 minutes. Stirring every couple of minutes.
  4. Add the cream cheese and make sure it mixes well into the corn.
  5. Cook for an additional 5-7 minutes.
  6. Enjoy!

Note: I have also tried this recipe using canned corn. I use a 15.25 oz can like this one.

Did you try this recipe? Rate it below and leave a comment. I’d love to hear your feedback.

View Posts

Go back

Your message has been sent

Rating

Warning

Grilled Plantains


As some of you may know, I am of Cuban decent and that means I share the love for platanos and/or maduros! Recently, one of our friends brought us over some plantains and we decided to try them on the grill. Boy did this turn out good! Anyway, this recipe is SO simple- it takes about 5 minutes to prep and then you just let the grill do the work (pls do not leave your grill unattended). These plantains come out so tender and the caramelization on top is absolutely perfect. Most plantain recipes give you that overly sweet flavor however, with this recipe I incorporate vinegar into my sauce to give it a tad of a tang. Hope you try this out and enjoy is as much as we did!

Ingredients

  • 4 plantains, cut lengthwise and with peel still on
  • 3 tbsp melted butter
  • 2 tbsp apple cider vinegar
  • 3 tbsp brown sugar

Cooking Instructions

  1. Preheat your grill to 500 degrees.
  2. In a small bowl, mix your butter, sugar, and apple cider vinegar.
  3. Once it reaches 500 degrees, place your plantains directly on the grill faced down.
  4. After 5 minutes, flip your plantains over and brush with brown butter sauce.
  5. Grill for another 5 minutes and glaze once again with brown butter sauce.
  6. Once the 5 minutes are up, remove the plantains from the grill. Your plantains will be done once they feel soft to the touch and you notice they are starting to seperate from the peel. You will also notice they will look caramelized on the top.
  7. Allow to cool for 5 minutes as they tend to be extremely hot.
  8. Enjoy!

Note: Make sure your plantains have some brown spots on them before you use them. If they are entirely green they will not taste the same.

Did you try this recipe? Rate it below and leave a comment. I’d love to hear your feedback.

View Posts

Go back

Your message has been sent

Rating

Warning