Snake River Farms Smoked Short Ribs


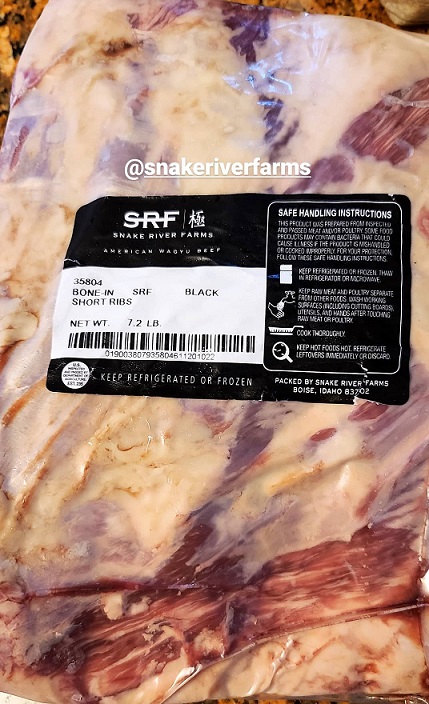
This short rib recipe was made during the holidays (you’ll notice by the pictures lol), and it came out so good that I had to share the recipe. Yes, it takes hours to cook and there are many steps to this recipe, but the end result is SO worth it- trust me! Usually, we like to treat ourselves around the holidays by ordering from our favorite place Snake River Farms. If you’ve never ordered meat from them, I highly suggest you give them a try. It’s not an all the time thing (at least not for us), but we do like to spoil ourselves every once in a while. They are family-owned and operated and offer the best meat we have EVER tried. So let’s talk meat! For this recipe, we ordered the American Wagyu Black Grade Beef Short Ribs. Ever tried these kind of short ribs? They are quite large compared to pork ribs and offer much more meat.

The smoker we used is a Masterbuilt 30-inch Digital Electric Smoker.

Snake River Farms American Wagyu Black Grade Beef Short Ribs
Ingredients & Prep
Catena Malbec
Right off the bone!

Ingredients

  • Rack of American Wagyu beef short ribs, we ordered these from Snake River Farms. If you buy them elsewhere, make sure they are roughly 7 lbs.
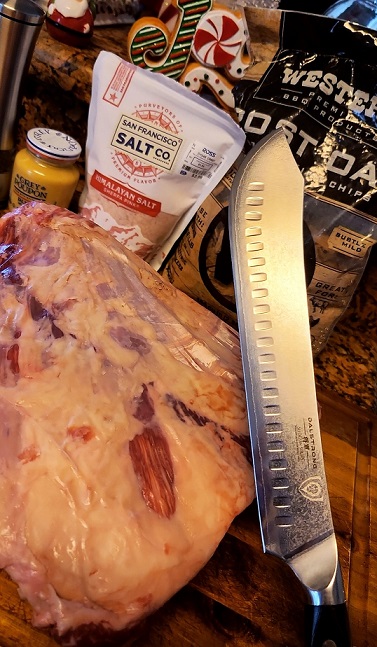
  • Dijon mustard, to lather on short ribs
  • Himalayan salt
  • Ground pepper
  • 1-1/2 cup red wine
  • Post Oak BBQ Cooking chunks

Cooking Instructions

  1. Start by trimming off excess fat from the meat until you begin to see the marbling. Do not touch the bone side.
  2. Lather Dijon mustard over the short ribs making sure to cover it entirely.
  3. Now sprinkle salt and pepper all over the meat, don’t be shy-be generous.
  4. Let sit at room temperature for 30 minutes to an hour.
  5. Place cooking chunks and water pan in your smoker and turn it on, setting it to 275 degrees.
  6. When your smoker reaches 275 degrees and it begins to smoke, place the ribs inside bone side down.
  7. Let this smoke for an hour undisturbed before you begin checking it.
  8. After three hours, your meat should be at 165 degrees or roughly near it. If it is not quite there, leave it a tad bit longer, letting it get closer to the temperature.
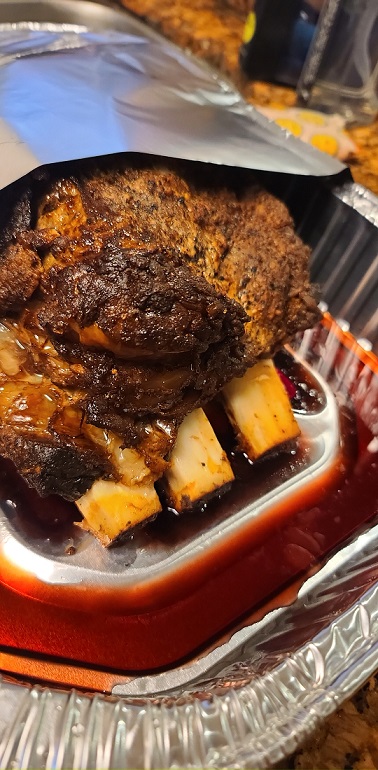
  9. Now take the ribs out of the smoker and place them in an aluminum pan (please make sure the pan you chose is a size that will fit inside your smoker).
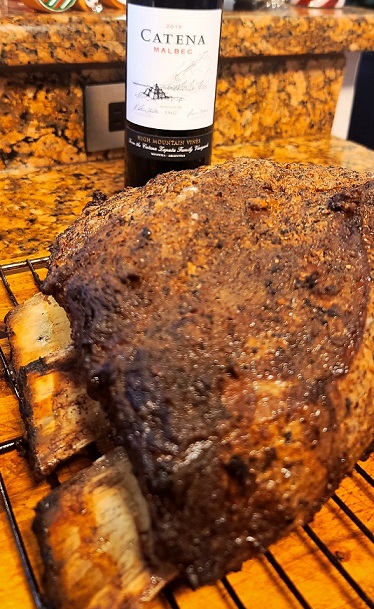
  10. Once you place the ribs inside the pan, pour in your red wine. We used a Malbec by Catena which you can see more about here.
  11. Seal the ribs with a layer of aluminum foil.
  12. Place the ribs back in the smoker and smoke for an additional 2-3 hours or until the meat thermometer reads 204 degrees.
  13. Take the meat out of the smoker, remove foil, and take out of the wine bath.
  14. Wrap bare meat in aluminum foil and place in a cooler for an additional hour.
  15. Take the meat out of the cooler and place on the cutting board.
  16. Slice and enjoy!

Note: If during the first smoking round you notice your meat is becoming dry, feel free to spray it lightly with water. Also, if you do not want to use wine, feel free to substitute it for beef or vegetable broth.

Did you try this recipe? Rate it below and leave a comment. I’d love to hear your feedback.

View Posts

Go back

Your message has been sent

Rating

Warning

Lemon Garlic Roasted Broccolini


I went to Fresh Market the other day and decided to buy some fresh broccolini, aka baby broccoli, to roast. I’ve always had it sauteed; however, I thought I’d try out a new method, and I am so glad I did. If you do not have a Fresh Market near you, I am sure you can also find broccolini at your local grocery store. This recipe is pretty straightforward (LOVE ME SOME EASY RECIPES) and takes minutes to prepare. Once you have seasoned everything, in the oven it goes and boom done!

Ingredients

  • 3 tbsp olive oil
  • 1 bunch of broccolini, rinsed and rough ends trimmed
  • 2 tbsp minced garlic
  • zest of 1 lemon
  • 1/2 squeezed lemon juice
  • Salt and pepper to taste

Cooking Instructions

  1. Preheat your oven to 425 degrees.
  2. Rinse your broccolini with water and trim off rough ends.
  3. Place the broccolini in a large bowl and drizzle with olive oil and top with minced garlic; toss well to incorporate all ingredients.
  4. Place broccolini on sheet pan in a single layer and sprinkle lemon zest over it.
  5. Drizzle with lemon juice.
  6. Sprinkle salt and pepper.
  7. Bake for 15-18 minutes until you notice the broccolini is turning golden brown and crisp on the tips.
  8. Enjoy!

Note: I have also tried this recipe with coconut aminos instead of lemon and omitted the salt and pepper. It was fantastic!

Did you try this recipe? Rate it below and leave a comment. I’d love to hear your feedback.

View Posts

Go back

Your message has been sent

Rating

Warning

Farmer’s Cheese Pancakes

So, we went to the store and in the cheese section I noticed farmers cheese. Did I know that to do with it-NO, however after searching online for what it’s used for I created this recipe. If you’ve never had farmers cheese, I would say its a mix between ricotta and cream cheese. If you enjoy both of those cheeses, then I highly suggest you try farmers cheese, you won’t be disappointed. These pancakes are cheesy and they are not your typical sweet pancake. You do put a bit of sugar in the batter to give it a hint of sweetness, yet they are not overly sweet.

Ingredients I use
This is that golden brown color you want to see when you flip them over.

Ingredients

  • Olive oil for pan
  • 7.5 oz farmers cheese
  • 1 egg
  • 1/4 cup flour
  • 1 tbsp sugar
  • 1/2 tsp baking powder
  • 1/2 tsp salt

Cooking Instructions

  1. In a medium sized bowl, mix together cheese, egg, flour, baking powder, and sugar.
  2. Heat a large skillet to medium heat with roughly 3-4 tbsp of olive oil.
  3. Making sure you hands are wet (this is a must so that the cheese mixture will not stick to your hands) form the pancakes. Pancakes should be small in size. If you notice the mix begins to stick to your hands, wet your hands some more.
  4. Place them in the skillet one by one as you form them.
  5. Fry them in the pan for about 3 minutes on each side or until they are golden brown on each side.
  6. Take them off the heat and place the pancakes on a plate.
  7. Enjoy!

Note: Feel free to top them with powdered sugar, jam, berries or syrup.

Did you try this recipe? Rate it below and leave a comment. I’d love to hear your feedback.

Remember to tag me on IG so that I can feature you on my page!

View Posts

Go back

Your message has been sent

Rating

Warning

Cheesy Cornbread

Cornbread is one of my favorite all time side dishes. Barbeques, family events, holidays- cornbread should be involved, atleast I think so, but maybe I’m just bias. After looking up multiple recipes and not being able to replicate what I invisioned, I decided to come up with an easy, cheesy, creamy version of my idea of a perfect cornbread. Anyway, for this recipe prepping takes no more than 5 minutes. You just mix all the ingredients and pop it in the oven. I’ve served this at several events/gatherings and my family/friends absolutely rave about it.

Ingredients

  • 1 package of Jimmy Corn Muffin mix
  • 1 can cream style corn (14.75 oz), I use this one
  • 1 can of whole kernel corn (drained) 15.2 oz, I use this one
  • 1/2 melted butter (unsalted)
  • 2 eggs
  • 1/3 cups cheddar cheese (shredded)
  • 1/3 cups mozzarella cheese (shredded)
  • 1 cup sour cream
  • salt to taste

Cooking Instructions

  1. Preheat your oven to 375 degrees.
  2. Mix all ingredients in a medium sized bowl.
  3. Spray casserole dish with non-stick spray (2-quarts), I’ve also used a bread loaf pan.
  4. Pour mixture into casserole dish.
  5. Place in the oven and bake uncovered for 40 minutes.
  6. Cornbread should be done when the top is golden brown and when you insert a spoon and it comes out fairly clean (remember we placed cheese in the mixture so spoon may not be fully clean when you remove it).
  7. Enjoy!

Note: If you do not have both of the types of shredded cheeses on hand, you can always just double the amount and use just one type.

Did you try this recipe? Rate it below and leave a comment. I’d love to hear your feedback.

View Posts

Go back

Your message has been sent

Rating

Warning

Zucchini topped w/ artichoke spinach dip

I am a spinach and artichoke dip lover, however I was looking for a way to avoid eating so many chips. Well, long and behold… that is how this recipe came about. This recipe is super easy to create and its so good for quick snacking or for parties/get togethers.

zucchini topped with artichoke spinach dip

Ingredients

  • 3 zucchinis cut into 1/2 inch rounds
  • 4 oz cream cheese (softened)
  • 1/2 cup frozen chopped spinach (drained)
  • 1/4 cup grated parmesan cheese
  • 2/3 cup fresh mozzarella (shredded)
  • 1/2 cup canned artichoke hearts, chopped and drained
  • 2 tbsp minced garlic
  • 2 tbsp of sour cream
  • 1 tsp red pepper flakes
  • Salt and pepper

Cooking Instructions

  1. Preheat your oven to 400 degrees
  2. Line a baking pan with parchment paper
  3. Slice zucchini into 1/2 inch rounds
  4. Align zucchini on pan making sure not to crowd too much and avoid layering them
  5. Mix the rest of the ingredients in a bowl to create spinach artichoke dip
  6. Using a spoon, grab some of the mixture and place it on top of each zucchini round
  7. Place in the oven and bake for 15 minutes
  8. Optional: once 15 minutes have elapsed, turn the oven to broil and cook for an additional 2 minutes. This gives it a bit more crunch and color.
  9. Take out of the oven and let rest for 5 minutes
  10. Enjoy!

Note: You can also use summer squash for this recipe and it will taste just as great. Also, I once ran out of mozzarella and substituted it with cheddar cheese and it was just as good.

Did you try this recipe? Rate it below and leave a comment. I’d love to hear your feedback.

View Posts

Go back

Your message has been sent

Rating

Warning

Roasted Bone Marrow

I’ve seen bone marrow in restaurant menus quite frequently and after trying it and loving that soft rich almost buttery taste, I knew I had to attempt making them at home. If you’ve never tried bone marrow, I would say the flavor is very rich, slightly sweet, and almost nutty. As for purchasing, I ordered these from Publix (thanks momma!), however I am sure you can order them from your local grocery store. Bone marrow should come free of any meat and they are whiteish/pinkish in color. Yes, seeing blood spots on the bones is normal so don’t panic.

Before popping them in the oven with seasonings.

Ingredients

  • 4 lbs of bone marrow
  • 3 tbsp of minced garlic
  • Olive oil
  • Fresh rosemary
  • Salt and pepper
  • Bread of choice to top marrow on. Our favorite to use is sourdough.

Cooking Instructions

  1. Preheat your oven to 425 degrees
  2. Line a baking pan with aluminum foil and drizzle with olive oil.
  3. Place the marrow on the foiled sheet making sure not to crowd or stack them.
  4. Sprinkle salt and pepper over the marrow (don’t be shy).
  5. Now using a small spoon, place a bit of the minced garlic on the top of the marrow.
  6. Grab your rosemary, remove leaves from stem and scatter above the bone marrow.
  7. Place in the oven and bake the bone marrow for 10-15 minutes.
  8. Enjoy!

Note: I say this range in cooking time because depending on the size of your marrow, you may only need to cook them for 15 minutes. It is essential to remove the bone marrow from the oven once they start bubbling on top so make sure to keep and eye on them after the 15 minute mark. Also, you will need small spoons or knives to pull of the marrow from inside the bone.

Did you try this recipe? Rate it below and leave a comment. I’d love to hear your feedback.

View Posts

Go back

Your message has been sent

Rating

Warning

Stuffed French Toast Crunchrolls

This recipe came about one day when I found myself wanting french toast, but couldn’t make them because we were out of milk. YAH, I know, sad day. However, thanks to that day, I was forced to get creative and make something yummy without dipping bread in batter like traditional french toast. Anyway, I tried to make this recipe somewhat healthier by using coconut palm sugar and using all natural preserves. Additionally, Arnold Country Sourdough has no high fructose corn syrup or artifical colors or flavors. You can always substitute the bread for whole grain and it will still taste great (trust me, we’ve done it) as long as it is sliced. My favorite part of this recipe is how the rolls become super crunchy since they are pan seared and then the ooey gooey yumminess from the filling provides that creamy component which ties everything together in so well.

Ingredients
Cut the crust off your bread
Fig jam on the left side and cream cheese mix on the right. You can also see how I rolled them up in the back.

Ingredients

  • 6 slices of bread, crust cut off (we use Arnold Country Sourdough Bread because it is our favorite, however remember any sliced bread will work)
  • 2 tbsp butter
  • 4 oz of preserve of your choice (our favorite is fig)
  • Powdered sugar for topping
  • Maple syrup for drizzle
Cream Cheese Spread
  • 4 oz cream cheese, room temperature
  • 1 tbsp coconut palm sugar
  • 2 drops of pure vanilla extract
    • Instructions: In a bowl mix your creme cheese, coconut sugar, and vanilla extract until its well combined and creamy.

Cooking Instructions

  1. Begin by cutting the edges off of each slice of bread.
  2. In a small bowl, mix all the ingredients for your creme cheese spread.
  3. Grab one slice of bread and spread one half with the creme cheese spread and the other half with preserve of your choice.
  4. Now grab one end of the bread and roll it up. Do not be alarmed if some of the stuffing comes out. This is normal.
  5. Do this until you have filled and rolled all your slices.
  6. Heat a pan to medium heat and place butter inside so that it begins to melt.
  7. Once butter is melted, begin placing your rolls into the pan flap side down.
  8. Let these cook for 2 minutes on the flap side and an additional minute on each other side. Make sure to rotate it to crisp all 4 sides.
  9. Remove rolls from skillet and sprinkle with powdered sugar and maple syrup.
  10. Enjoy!

Note: We use pure maple syrup, however feel free to use honey or agave as substitutes. At times I’ve even found myself drizzling melted chocolate over the crunchwrap and OMG. Also, make sure to eat these soon after they are removed from the pan to avoid them from getting soggy.

Did you try this recipe? Rate it below and leave a comment. I’d love to hear your feedback.

View Posts

Go back

Your message has been sent

Rating

Warning

So-fish-ticated Swordfish Nuggets

So my mom works in the seafood department at Publix and she is always trying new recipes with fish, however this time, it was my turn! She recently sent over some raw swordfish nuggets and told me to give them a try. Turns out these little guys are super easy to cook and they are a hit in my family now. You can easily find swordfish at your local Publix grocery store (if it is not available that day, I know you can have the fish ordered and it will arrive in a couple of days) and I believe I have seen them at our local Whole Foods as well. For this recipe, all you need is some seasoning commonly found in most pantries and an air fryer and you’re good to go! I’m not going to lie, I was a bit intimidated by this fish because it’s not a common one you see cooked frequently, but trust me you will not be disappointed.

Left: how they look once you buy them; Right: seasoned & tossed

Ingredients

  • 2.5 lbs swordfish nuggets
  • 1 tbs olive oil
  • 2 tsp paprika
  • 2 tsp garlic powder
  • 2 tsp onion powder
  • 2 tsp cayenne pepper
  • 2 tsp thyme
  • salt and pepper to taste
  • lemon to squeeze over nuggets once finished (optional)
  • 1 tsp of parsley for garnish

Cooking Instructions

  1. Rinse your swordfish nuggets.
  2. Grab a bowl and place the nuggets in the bowl and drizzle with olive oil.
  3. In a seperate small bowl, combine all the dry spices.
  4. Sprinkle seasoning over swordfish in the bowl.
  5. Toss well to combine and so that all the swordfish is evenly coated.
  6. Place the swordfish in your air fryer and set to 400 degrees for 15 minutes.
    • Do not stack the swordfish in the air fryer. I find myself making 2 seperate batches to ensure they all come out crispy.
  7. Once finished remove swordfish from air fryer.
  8. Garnish with parsley and sprinkle with lemon.
  9. Enjoy!

Note: The lemon juice is completely optional, but it does give the fish a nice vibrant taste so I highly recommend it.

Did you try this recipe? Rate it below and leave a comment. I’d love to hear your feedback.

View Posts

Go back

Your message has been sent

Rating

Warning

OH-my-Gourd

Okay, so I love me some squash and since Fall is here, what better way to endulge than with some squash recipes?! For this recipe, I used acorn squash which provides a milder taste than butternut squash, however it is still sweet and gives a hint of that nutty flavor. Acorn squash is so versitile which makes it a great ingredient for roasting, grilling, sauteing, baking or steaming. Anyway, this recipe is really simple. All you have to do is prepare your squash, toss all your ingredients, and pop it in the oven.

Acorn squash
Left: once cut lengthwise, Right: seeds removed
Cut and added butter & spices.
Put these on a board along with other veggies and some sausage.

Ingredients

  • 2 acorn squash
  • 2 tbsp melted butter
  • 2 tsp rosemary
  • 2 tsp garlic powder
  • 1/4 cup parmesan cheese
  • salt and pepper to taste
  • 2 tsp of parsley for garnish

Cooking Instructions

  1. Preheat your oven to 400 degrees.
  2. Cut your acorns lengthwise and scoop out all the seeds.
  3. Now slice each half into slices (roughly 1/2 inch thick).
  4. Combine all ingredients minus the parsley in a large mixing bowl.
  5. Now add the squash and toss until well incorporated.
  6. Line a baking sheet with aluminum foil.
  7. Line the squash on baking sheet making sure not to crowd. Do not stack them.
  8. Bake for 23-25 minutes.
  9. Take out of the oven and let cool.
  10. Garnish with parsley and additional parmesan cheese if you wish.
  11. Enjoy!

Note: It is safe to eat the skin, however if you wish not to, it is easy to just peel off the skin on the slices.

WIll be posting more grilled vegetable recipes soon. Stay tuned!

Did you try this recipe? Rate it below and leave a comment. I’d love to hear your feedback.

View Posts

Go back

Your message has been sent

Rating

Warning

Sundried Tomato Chicken

This is one of my favorite chicken recipes because it is packed with flavor and the sauce is perfect over most grains. You can whip it up in roughly 15 minutes and then just finish it up in the oven while you complete other tasks (atleast this is what I do). Sometimes we eat chicken so much throughout the week that it can tend to get boring, however, I like to get creative with ingredients/flavors and that’s just how this dish came about.

Season both sides of chicken with garlic powder, pepper, and salt.
Sundried tomato and onion mix.
Right before placing in the oven, cover your chicken with mix and a bit of sauce to avoid losing moisture and flavor.

Ingredients

  • 3 chicken breast
  • 2 tbsp olive oil
  • 1 tbsp minced garlic
  • 1 tbsp of butter
  • 1 yellow onion
  • Handful of sundried tomatoes of your choosing (we buy these), chopped
  • 1/2 cup of heavy whipping cream
  • 1/2 cup of chicken broth
  • Garlic powder
  • Salt
  • Pepper

Cooking Instructions

  1. Grab a medium sized pan, add the olive oil and set to medium-high heat.
  2. Season both sides of your chicken breast with garlic powder, salt, and pepper.
  3. Once pan is hot, place your chicken breast in the pan and cook for 4 minutes on each side.
  4. While chicken is cooking, mince your garlic, and slice your onions and sundried tomatoes.
  5. Once chicken is cooked on both sides, remove from pan and place on a plate.
  6. Preheat your oven to 375 degrees.
  7. Using the same pan, set to medium heat and add your butter.
  8. Once butter has melted, add your onions and let sautee for roughtly 2 minutes.
  9. Add your garlic and cook for another minute until fragrant.
  10. Now add your sundried tomatoes and cook for an additional minute.
  11. Now set your heat to medium low and add the chicken broth to deglaze the pan.
  12. Once deglazed, stir in the heavy cream and let cook for 3 minutes.
  13. Add chicken back to the pan and coat with onion/tomato mix and sauce.
  14. Place in the oven for 18-20 minutes.
  15. Remove from oven and place over cooked rice.
  16. Enjoy!

Note: You can serve this over white rice as I have done in this picture, but feel free to substitute for brown rice or your choice of pasta (e.g., whole grain, zucchini noodles, e.t.c). It works and taste just as great!

Did you try this recipe? Rate it below and leave a comment. I’d love to hear your feedback.

Remember to tag me on IG so that I can feature you on my page!

View Posts

Go back

Your message has been sent

Rating

Warning